
Blog
72 Hour Rescue Checklist for Growers: Trichoderma Contamination

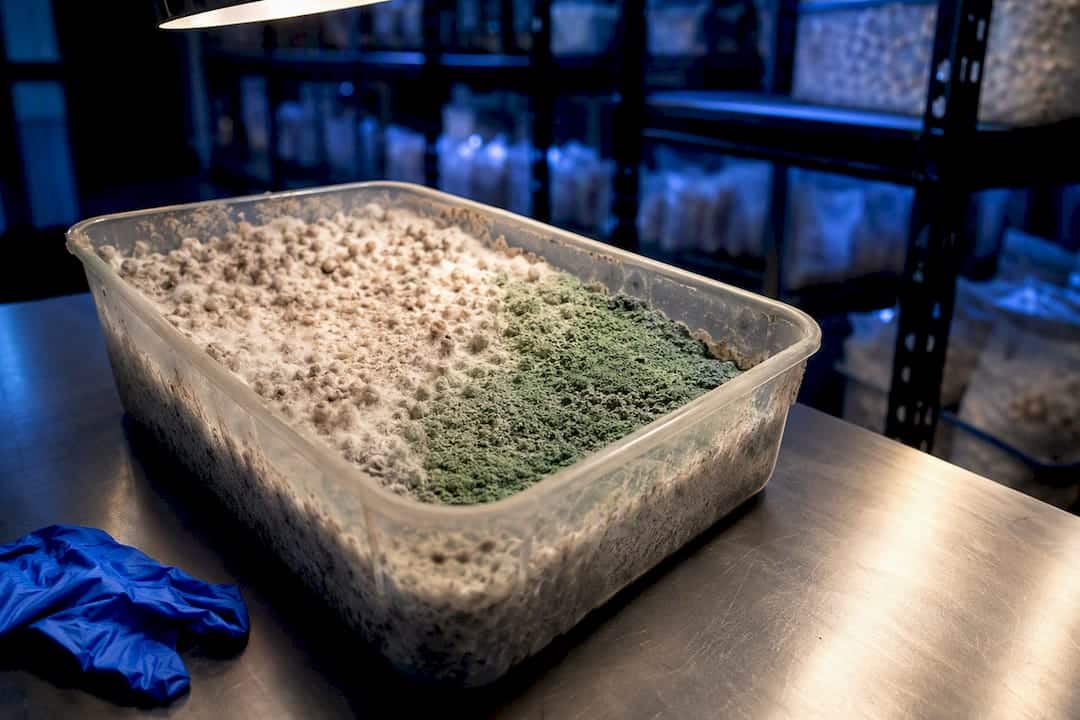
If you see white fluff turning bright green with a faint coconut smell, that’s almost certainly Trichoderma contamination. Never open a sporulating bag or bin indoors without a mask and gloves.
TL;DR:
- Trichoderma initially appears as dense, white mycelium that quickly turns green and sporulates within 24 to 48 hours, often starting at bag seams or ports.
- The fungus feeds on mushroom mycelium by secreting enzymes that break down its cell walls, making it highly destructive once established.
- Early signs include a coconut or sweet moldy smell and rapid growth, which can be confirmed by specific tests like smell, stickiness, or growth rate.
- Rescue is only possible if contamination is surface-level and caught quickly; otherwise, disposal and thorough decontamination are necessary to prevent spread.
- Prevention relies on using vigorous, lab-tested spawn, proper sterilization, pH control, and strict hygiene to give mycelium a competitive advantage over Trichoderma spores.
Table of Contents
- What Does Trichoderma Contamination Look Like?
- Why Does Trichoderma Spread So Fast and Damage Mycelium?
- Should You Rescue or Discard a Contaminated Grow?
- How Do You Prevent Trichoderma Contamination in the First Place?
- How Do You Decontaminate a Grow Room After an Outbreak?
- Is Trichoderma Contamination a Health Risk to People?
- Is Trichoderma Really That Different From Other Contaminants?
- Want a Lower-Risk Way to Start Your Next Grow?
- Where Can You Learn More About Trichoderma Contamination?
- Sources
What Does Trichoderma Contamination Look Like?
Trichoderma starts out looking almost innocent. It emerges as a patch of dense, white mycelium that could pass for healthy growth, which is exactly why so many growers miss the window to act. Within 24 to 48 hours, that white patch develops a yellowish tinge, then blooms into a distinct forest or emerald green as it sporulates. By the time you see solid green, the fungus has already been feeding for a day or two.
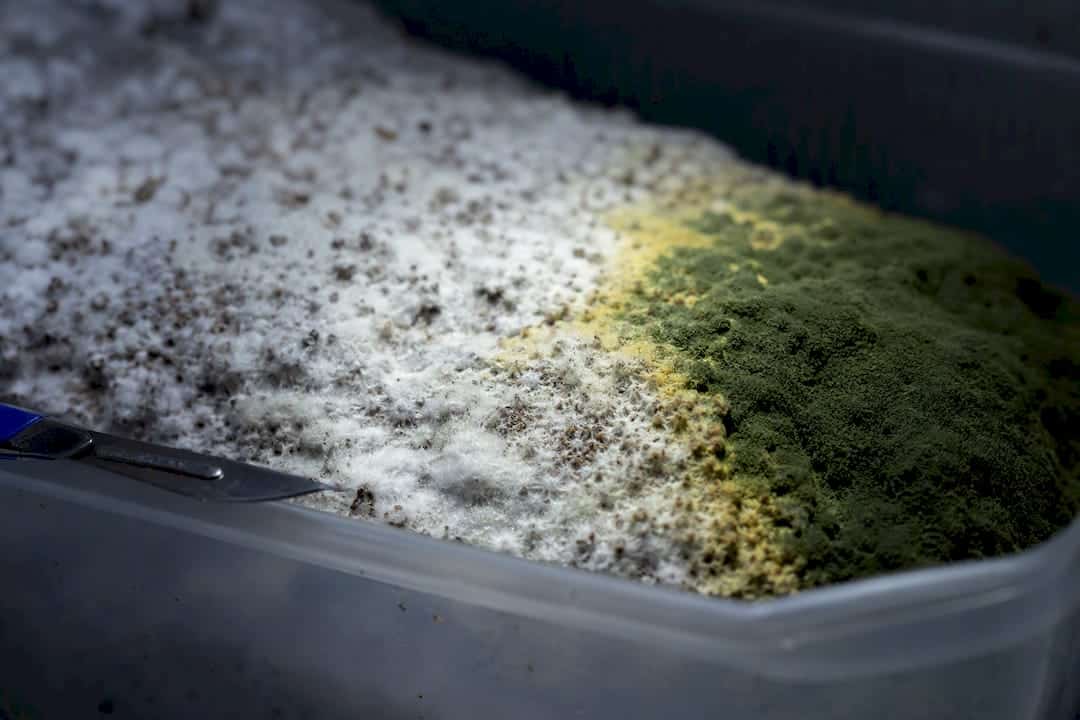
The texture gives it away faster than color sometimes does. Trichoderma mycelium grows tighter and more compact than the fluffy, rope-like strands of healthy oyster or Psilocybe mycelium. It often appears in concentric rings radiating outward from a single point of entry, almost like a target pattern pressed into the substrate.
Location matters too. Trichoderma tends to show up first at bag seams, injection ports, the edges of a monotub, or anywhere air exchange creates a gap in humidity control. These are the exact spots where spores from the room’s air have the easiest entry.
The scent is the most reliable early warning most growers overlook. Trichoderma produces a compound called 6‑PAP that smells distinctly like coconut or sometimes sweet, moldy hay, according to ShroomCraft Lab’s diagnostic guide. If you catch that coconut note before any green is visible, you’re looking at contamination in its earliest, most treatable stage.
A few quick checks help you confirm what you’re looking at before you panic:
- Smell test: Crack the lid or bag briefly and sniff for a coconut or sour, musty note rather than the neutral, earthy smell of healthy mycelium.
- Q-tip test: Lightly press a cotton swab into a suspicious patch. Trichoderma tends to release a faint green dust or leave a slightly slimy residue; clean white mycelium usually doesn’t.
- Light angle check: Tilt the container under a lamp. Healthy mycelium looks matte and fibrous; early Trichoderma often has a slightly wetter, denser sheen before it greens up.
- Growth speed: If a patch doubled in size overnight, that pace is far more typical of Trichoderma than of your intended mushroom species.
False positives happen constantly with beginners. Rhizomorphic mycelium, some cobweb mold (which stays gray and fuzzy, not green), and even certain lighting can trick a new grower’s eye. Cobweb mold grows loosely and collapses when touched; Trichoderma stays dense and doesn’t wilt. When you genuinely can’t tell, isolate the container and send a sample for lab identification rather than guessing.
Pro Tip: Keep a small notebook or phone log of when you first noticed any unusual patch. Trichoderma’s speed is one of its biggest tells, and knowing exactly how many hours passed between “looks fine” and “looks green” helps you and any lab confirm the diagnosis faster.
Why Does Trichoderma Spread So Fast and Damage Mycelium?
Trichoderma isn’t just a mold competing for space. It’s a mycoparasite, meaning it actively hunts down and digests other fungi, including the mushroom mycelium you’re trying to grow. It does this by secreting chitinases and glucanases, enzymes that break down the cell walls of competing hyphae, according to research on invasive Trichoderma infections. Once those enzymes go to work, your mushroom mycelium doesn’t just get crowded out. It gets eaten.
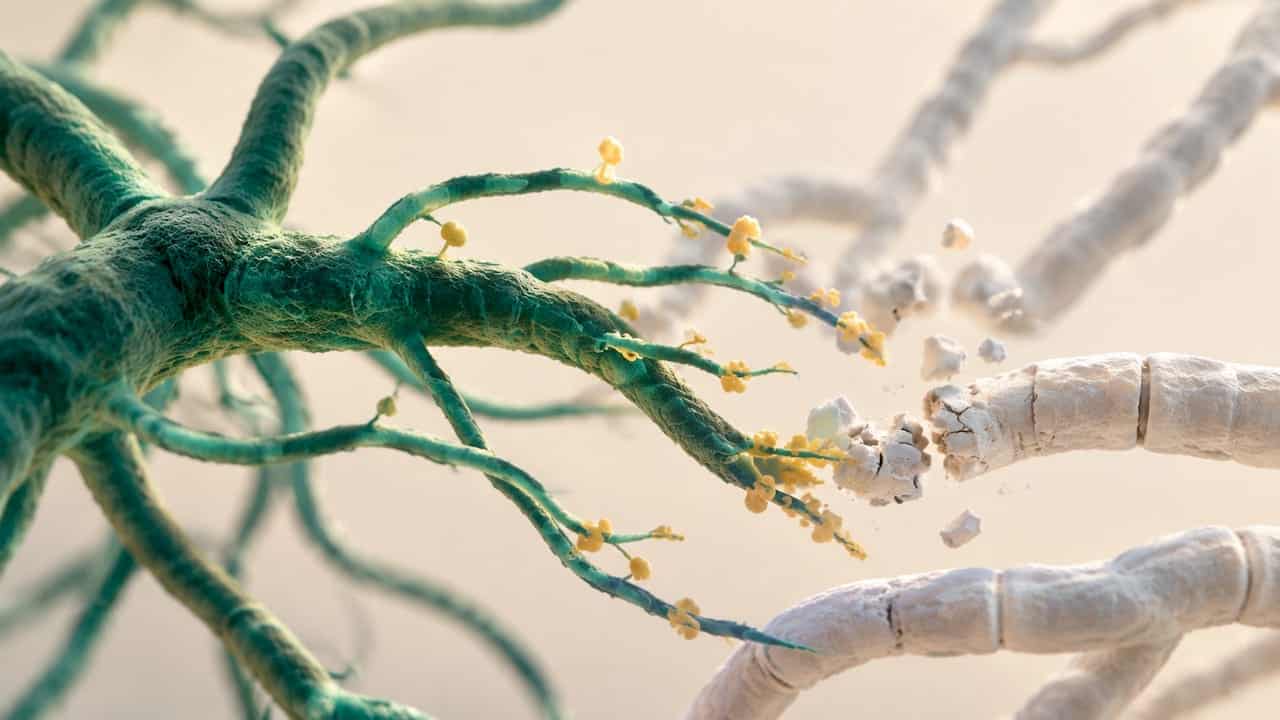
Spore ubiquity makes this worse. Trichoderma spores are practically everywhere: in soil, compost, wood chips, and floating in ambient air. A single overlooked crack in a fruiting chamber’s seal is often all it takes for spores to land and germinate.
Historical outbreaks in Pennsylvania mushroom houses caused crop losses ranging from 30% to 100% in affected growing rooms, largely traced back to contaminated personnel, tools, and rooms that weren’t steamed thoroughly enough between crops, according to Penn State Extension. That range alone tells you how unforgiving this contaminant can be once it establishes itself at scale.
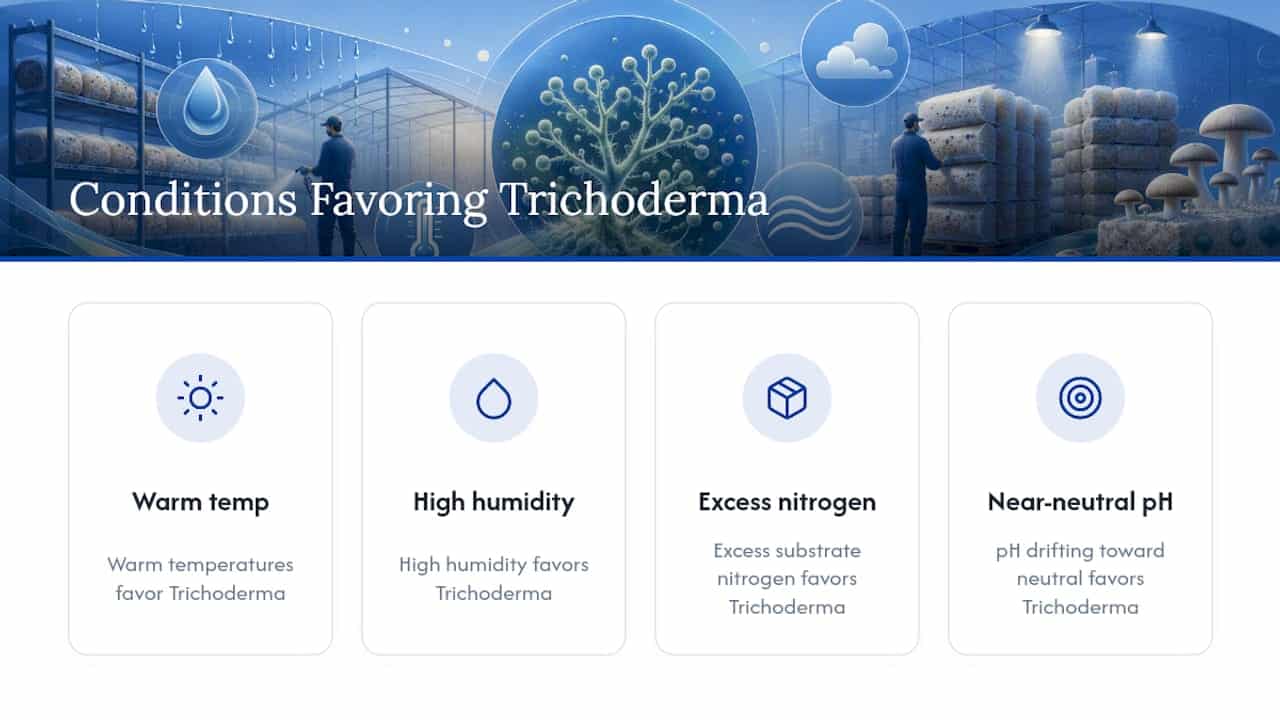
Not all Trichoderma species behave the same way. Some strains are aggressive colonizers that tear through a substrate within days, while others move more slowly and stay localized longer. Warm temperatures, high humidity, excess nitrogen in the substrate, and a pH drifting toward neutral all favor Trichoderma over your intended mushroom species. That’s the environmental sweet spot you’re trying to avoid creating in the first place, and it’s exactly why the prevention steps below focus so heavily on humidity, nitrogen, and pH control rather than treating contamination as pure bad luck.
Should You Rescue or Discard a Contaminated Grow?
The decision comes down to how far the contamination has spread and whether it’s still confined to the surface. Don’t negotiate with substrate that’s contaminated internally. It isn’t salvageable and trying to save it usually just spreads spores around your grow space.
If you’re in rescue territory, work through this sequence:
- Isolate the container immediately. Move it away from other active grows, ideally to a separate room or at minimum a closed container.
- Put on PPE before opening anything. A properly fitted respirator (not just a paper mask), nitrile gloves, and eye protection matter here. Trichoderma spores are a genuine respiratory irritant, and some species carry real infection risk, particularly for people with compromised immune systems, per the Journal of Antimicrobial Chemotherapy’s clinical review.
- Excise the patch with a generous margin. Cut out the visible contamination plus at least an inch of surrounding substrate that looks clean. Use a sterilized blade for each cut and don’t reuse it on healthy areas afterward.
- Treat the cut edges. A 3% hydrogen peroxide solution dabbed directly onto exposed cut surfaces, sometimes combined with a light dusting of table salt, works as an early-stage spot treatment, according to ShroomCraft Lab’s field guidance. Skip bleach on active porous substrate; it’s too harsh and can damage the mycelium you’re trying to save.
- Move the container to a rescue chamber. This should be a separate, lower-humidity space with stronger fresh air exchange (FAE) than your main setup, giving your mushroom mycelium a fighting chance to outcompete any remaining spores.
- Watch daily for 72 hours. Any return of green growth means the rescue failed. Discard immediately rather than trying a second round.
If you’re past the rescue threshold, disposal is about containment, not conservation:
- Double bag the contaminated substrate before it leaves the grow room, sealing each bag before moving it.
- Dispose of it outdoors in regular trash. Don’t add it to a home compost pile unless that pile reliably sustains internal temperatures above 160°F, which most backyard setups don’t.
- Disinfect every tool and surface the contaminated material touched, including the outside of gloves before you remove them.
- Wash your hands thoroughly and change clothes if you were in close contact with a sporulating patch.
Pro Tip: Never shake, blow on, or vacuum a green, sporulating patch. Any of those actions aerosolizes millions of spores into your air, which is the single fastest way to seed contamination into every other grow in the room.
How Do You Prevent Trichoderma Contamination in the First Place?
Prevention beats rescue every time, and it starts before you ever inoculate a substrate. Extension specialists are blunt about this: total elimination of Trichoderma from your environment is not realistic, since spores are essentially everywhere. The real goal is giving your mushroom mycelium such a strong head start that Trichoderma never gets a foothold, an approach Penn State Extension frames as out-competing rather than eliminating the contaminant.
A handful of practices make the biggest difference:
- Start with fresh, lab-tested spawn. Vigorous spawn colonizes faster, and speed is your best defense since Trichoderma needs time and an open niche to establish itself.
- Match your sterilization method to your substrate. Pressure sterilization at 15 PSI for roughly 90 minutes is the standard for nutrient-rich, bran-amended substrates, according to guidance from the AHDB knowledge library on managing Trichoderma in commercial mushroom production. For lower-nutrient lignocellulosic materials like straw or sawdust, hot-water immersion at moderate temperatures for extended periods or immersion in alkalinized water have been shown in controlled experiments to reduce Trichoderma growth, offering gentler alternatives to full sterilization.
- Don’t over-sterilize and then re-expose. Sterilized substrate that gets re-inoculated with even trace Trichoderma can actually favor the contaminant, because sterilization wipes out the competing microflora that would normally help keep it in check, a finding documented in research on lignicolous mushroom cultivation.
- Watch your nitrogen levels. Excess nitrogen supplementation shifts your carbon-to-nitrogen ratio in a direction Trichoderma exploits. Balance is more protective than piling on extra nutrients.
- Buffer your casing layer with hydrated lime. Raising casing pH above roughly 8.0 with calcium hydroxide inhibits Trichoderma spore germination while most gourmet mushroom mycelia tolerate the shift fine. Test on a small batch first since tolerance varies by species and strain.
- Run a sealed chamber with scheduled fresh air exchange. Growers using app-controlled or timer-based FAE report noticeably fewer green mold incidents than those relying on manual humidity tents, based on operator observations from Lykyn’s grower guide.
- Enforce clean-handling discipline. Dedicated grow-room clothing, tools that never touch outdoor soil or compost, and a habit of washing hands before opening any container all close off the entry points Trichoderma relies on most.
Reliable spawn is worth emphasizing on its own. If you want a deeper look at how spawn vigor drives faster colonization and stronger competitive resistance, our guide to growing B+ mushrooms with 100% mycelium walks through exactly why that head start matters.
How Do You Decontaminate a Grow Room After an Outbreak?
Once contaminated material is gone, the room itself still needs real attention before you restart anything. Skipping this step is how a single outbreak turns into a recurring problem.
- Empty the space completely and dispose of all contaminated substrate, casing, and disposable liners before cleaning anything else.
- Wipe down every hard surface with a disinfectant appropriate for the material. Diluted bleach solutions work well on non-porous surfaces like plastic bins and metal shelving, with a contact time of at least 10 minutes before rinsing.
- Replace anything porous that touched the contamination directly. Foam gaskets, cloth filters, and cardboard simply can’t be reliably sterilized.
- Clean or replace HVAC filters, humidifier reservoirs, and any HEPA filtration in your fruiting chamber, since spores lodge in these far more than most growers expect.
- Consider ozone or UV treatment for a persistent recurring problem in a dedicated grow space, but only with proper ventilation and never while people or pets are present in the room.
- Wait at least 48 to 72 hours after cleaning, then run an empty test cycle to confirm no green growth appears before introducing a new batch.
Pro Tip: Run a clean, uninoculated substrate sample through your decontaminated room for a few days as a canary test. If it stays clean, your room is genuinely ready. If green shows up on the test sample, you’ve got a lingering source somewhere you haven’t found yet.
Is Trichoderma Contamination a Health Risk to People?
For most healthy growers, brief exposure to Trichoderma spores causes mild respiratory irritation at worst, similar to reacting to any household mold. The bigger concern is for people who are immunocompromised, where certain species have been linked to genuinely invasive infections rather than just surface irritation, according to clinical reviews of Trichoderma infections.
A few points worth keeping in mind:
- Some strains produce mycotoxins, including gliotoxin, which is one more reason contaminated mushrooms should never be eaten, harvested, or salvaged for consumption.
- Growers with chronic lung conditions, autoimmune disorders, or suppressed immunity should avoid handling sporulating material entirely and let someone else manage disposal if possible.
- Seek medical attention if you develop persistent respiratory symptoms, skin irritation that doesn’t resolve, or any fever following heavy exposure, and tell your clinician specifically that you were exposed to Trichoderma mold spores and mention your immune status.
Is Trichoderma Really That Different From Other Contaminants?
Most beginner troubleshooting guides lump Trichoderma in with cobweb mold, black pin mold, and bacterial wet spot as if they’re roughly interchangeable problems. They’re not. Cobweb mold is mostly a nuisance you can often out-grow with a light hydrogen peroxide misting. Trichoderma is a predator with a chemical arsenal built specifically to break down fungal cell walls, and that distinction should change how seriously you treat the first sighting.
What surprises a lot of new growers is that sterilization, the step everyone assumes is the safest possible substrate prep, isn’t automatically the winning move against this particular contaminant. Wiping out the competing microbial community on a substrate and then reintroducing even a trace of Trichoderma can hand it an open field with no rivals left to slow it down. That’s a genuinely counterintuitive result, and it’s why matching your prep method to your substrate type matters more than defaulting to the most aggressive-sounding option.
The other thing worth saying plainly: rescue attempts fail more often than beginner forums admit. Anything beyond that is usually money and time better spent starting clean than fighting a losing battle and risking your entire growing space in the process. Starting with pre-colonized, lab-tested material removes a huge share of the guesswork that leads to contamination in the first place, simply because you’re not the one managing every variable from raw grain to first pins.
— Alex
Want a Lower-Risk Way to Start Your Next Grow?
Every prevention step above boils down to one idea: give your mycelium the fastest possible head start so contaminants never get a foothold. A pre-colonized, lab-tested starter block does exactly that by skipping the riskiest phase of the process, the early grain-to-substrate window where most home contamination actually begins.
Some suppliers build their kits around that principle. Look for three things in any kit you consider: documented lab testing for contaminants, clear step-by-step instructions that match your experience level, and a support channel you can actually reach if something looks off. Our 100% mycelium B+ grow kit guide breaks down what fast, verified colonization looks like in practice, and our grow kit FAQ covers the troubleshooting questions beginners ask most. If you’re ready to skip the highest-risk stage of the process entirely, browse our full lineup of fresh grow kits and pick a starter block built to outcompete contamination from day one.
Where Can You Learn More About Trichoderma Contamination?
For deeper reading beyond this guide, Penn State Extension’s green mold overview remains the standard reference on outbreak patterns and prevention in commercial settings. The peer-reviewed study on substrate treatments offers the experimental data behind hot-water and alkaline immersion methods. For the clinical side, the Journal of Antimicrobial Chemotherapy’s review of invasive infections and the PMC review on Trichoderma harzianum safety cover human health risk in detail. For hands-on species identification, ShroomCraft Lab’s diagnostic guide remains one of the most practical field references available.
Sources
- Green mold of mushrooms (Penn State Extension)
- Efficiency of treatments for controlling Trichoderma spp during spawning in cultivation of lignicolous mushrooms
- Invasive Trichoderma spp. infections: clinical presentation and outcome (Journal of Antimicrobial Chemotherapy)
- How to Identify Trichoderma: Technical Diagnosis of the Green Monster — ShroomCraft Lab